- Why MOX
- Features
Features
Explore MOXEnterprise-level tools for managing M&TE and laboratory workflowCritical calibration and maintenance records in the palm of your hand - About Us
- Resources
Resources
- Contact Us
Your trial includes the full functionality of the following MOX modules:
The installer will place shortcuts for both CMS and MPS on your desktop. You can launch either application by clicking on its shortcut.
The sample database provided with your trial includes sample assets, standards and calibration procedures representative of a cross section of calibration disciplines.
Note: MOX MPS utilizes National Instruments Visa to communicate with instruments via GPIB, USB, RS 232 etc. To perform actual calibration with this trial, please click on the following link to download the (free) National Instruments Visa:
The following steps will guide you through a very simple workflow in MOX. We will demonstrate how to :
1. Access CMS and sign in.
2.Select an asset.
3.Receive an asset for calibration.
4.Create a work order.
5. Open a work order.
6.Launch MPS to perform a calibration
i. Click on the MOX CMS shortcut on your desktop to launch CMS.

ii. Sign in with the provided credentials.

From the Assets tab, go to the Assets section. Each row in the Asset List section represents a single asset.
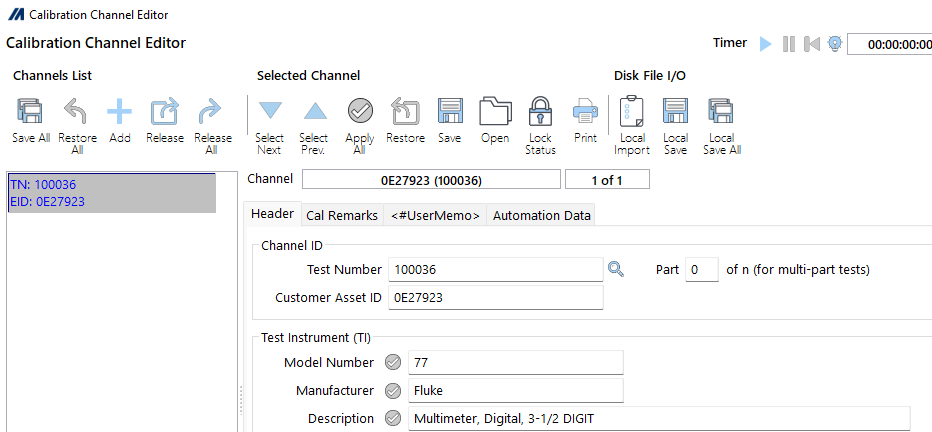
Select an asset to work with and note its Asset ID. For this example we have picked a Fluke 77 with Asset ID HS-0E27923.
NOTE: Please select an asset that does not have an existing work order. In the Asset List section scroll to the left until you see the Work Order column. Make sure the asset you select does not have a work order displayed in the Work Order column.

TIP: You can double click on any row to see details about the asset in the Asset Detail section.
Now go to the Receiving section under the Workflow tab.
i. Select Asset ID in the Entry Mode
ii. Enter the Asset ID for the asset selected in the previous step
iii. In the Receiving Mode select Work Order Only
iv. Hit Enter
NOTE: The Receiving screen is where users process assets physically received at the laboratory for calibration.

TIP: In production, you can set the Entry Mode to Barcode and simply scan the asset’s barcode to receive the asset.
i. The Receiving Status column should indicate Ready to Receive (if the Work Order column displays a work order #, please try an alternative asset that does not have an existing work order) .
ii. Click on Receive Asset and the system will automatically create a work order.

Clicking on the Work Order hyperlink will take you to the Work Order detail.

Alternatively, you can access the work order from the Work Orders List section under the Work Order tab.

i. From the Work Order screen go to the Actions drop down menu.
ii. Click on launch MPS.
The system will launch MPS and auto populate required MPS fields with information about the asset to be calibrated.

We recommend watching the following presentations in the order listed:
Calibration Management System (CMS) – User Interface
Calibration Management System (CMS) – Overview